Materials
1. Scissors, markers, small stickers or white address labels
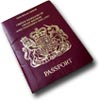
2. “Bible Passport” (patterned after a real passport) If you have a polaroid camera, you can even take pictures of the youth for their passports. Another option is to ask them to bring a picture of themselves for the next week. Neoprint pictures also work well.
Activity
As you discuss different Bible stories and characters you can discuss destinations and have them write brief notes in their passports. You might have youth create a special symbol or stamp for the passport based on each Bible destination. If you are really feeling creative, have someone dress up as a Bible character (like Paul) and tell them about the various places he visited. Have youth write down the names of places visited and what happened at each.
Application
“Traveling, through the Bible takes us to many wonderful places. We can travel through the promised land with Joshua, or wander in the desert with Moses. We can travel with Paul to Asia Minor and with Philip to see the Ethiopian. The Bible is like a passport to many places.”
Bible Passport Inscription
The King of Kings
hereby requests all who it may concern to permit this citizen of Heaven (statute Phil: 3:20) named herein to go into all the world and in case of need to be provided with all necessary aid and protection from enemies of God’s Kingdom. (statute John 17:17-18)
 MORE IDEAS? See “Creative Object Lessons”
200 page e-book that explains everything you need to know when planning your very own object lessons. It contains 90 fully developed object lesson ideas and another 200 object lesson starter ideas based on Biblical idioms and Names / Descriptions of God.
