Description of this Easter Object Lesson
While much of the religious symbolism has been forgotten, the Piñata is a great object lesson for youth or as a Children’s Sermon at Easter, Lent, or simply as a lesson on the blessings of God.
The History of Piñatas
Piñatas are favorites at Mexican fiestas (parties/ celebrations) although their true origin was likely in China. According to tradition, they used something similar to modern pinatas in China to celebrate the New Year and possibly for other occasions as well. They were often made in the shape of livestock (buffalo, oxen, or cows) and filled with seeds that spilled onto the ground when the piñatas were broken. Broken pieces of the pinata were then burned and villagers took some of the ashes home with them for good luck in the coming year.
According to historians, it was Marco Polo who brought back the Piñata to Europe and introduced it first to the Italians. The first European pinatas were were clay pots unlike the paper mache pinatas that we see today. In fact, the Italian word “pignatta” means “fragile pot” and the original piñatas resembled thin clay containers for carrying water.
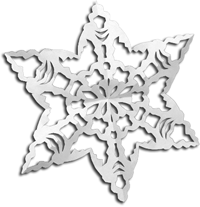
In Europe, the tradition was adapted by the church sometime during the 14th century and was used as an object lesson during the celebration of Lent to teach spiritual truths. The first Sunday during Lent became known as “Pinata Sunday”. On this day, a pinata shaped like a star with seven points was used – each point supposedly representing one of the seven deadly sins; lust, gluttony, greed, sloth, envy, anger and pride. The blindfolded participant represented the conqueror of evil, or faith, which must be blind. People would gather around the player and spin him to disorient him. Sometimes they would spin the person around thirty three times in memory of the years Christ lived on earth and resisted temptation. The other participants would cry out directions (either to help or mislead) indicating to the player to hit higher, more to the right, straight ahead, etc. When someone broke through one of the seven points with the stick (which represented virtue, righteousness or faith) it brought to mind the symbolism of breaking the bad habits of the seven deadly sins and our personal triumph over temptation, resulting in a delightful shower of blessings from God. The pinatas were filled with small toys, fruits, seeds, and candy and said to represent hope – since it was always hung above the heads of the participants as a reminder that one had to look toward heaven in expectation of blessing and divine strength to triumph over temptation. The moral of the piñata: all are justified through faith and welcome to the blessings of God. This seven pointed star as a version of the pinata is still very common today though the symbolism has been forgotten by most.
When the custom spread to Spain, the first Sunday in Lent became a fiesta called the “Dance of the Piñata” and they used a clay container called “la olla”, the Spanish word for “pot”. When the tradition first started, the pot was undecorated, later, ribbons, tinsel and fringed paper were added and wrapped around the pot.
Tradition says it was the Spanish that brought the pinata to Mexico where a very similar tradition already existed. Supposedly the Aztec and Mayan Indians of Mexico filled clay pots with nuts, berries, fancy beads, and painted stones as a birthday celebration offering to their god of war – Huitzilopochtli. Priests then hung the filled pots on a pole near the god and during the birthday celebration, the pots adorned with colorful feathers would be hit with decorated sticks – breaking the pots and spilling the offerings at the feet of their god, thus insuring a prosperous year. Since the Spanish tradition was similar to the one that already existed in Mexico, Catholic priests introduced their version as a replacement to the worship of the local pagan gods and to instruct them about the one true God.
Pinatas today
While most common in Mexico, pinatas are enjoyed around the world where they are a great youth party activity for quite a number of celebrations and Holidays including birthdays, Christmas, Thanksgiving, Halloween and even New Year’s Eve. Today, the piñata has lost almost all of its religious symbolism and is simply a popular party game. Yet in Mexico they are very popular during “Las Posadas” (Christmas processions) and for birthday parties. Around Christmas, wrapped candies, peanuts, guavas, oranges, jicamas(a sweet root vegetable), sugar cane, and tejocotes (a kind of crab apple) fill the piñatas and some is also set aside for any child that ends up without a
treat when the pinata is broken.
How to Make your own Pinata
Making a piñata for a youth party or as a craft project for your kids is a great way to exercise their imagination as well as provide an outlet for excited energy. There’s always an uproar of excitement when youth break open these festive vessels to reveal an abundance of gifts and candy inside. Depending on what’s inside they are enjoyed by children, youth, and even adults.
What follows are some instructions on how to make piñata, a few ideas on how to decorate your completed pinata, instructions for the standard game with pinatas, and some possible applications for Bible Study lessons:
A piñata is basically a very fragile hollow container made of paper mache and decorated with bright crepe paper or painted. To make your own pinata you will need some basic supplies listed below and of course a little imagination doesn’t hurt either.
Materials Needed to make your Party Pinata
- Paper Mache (See Recipe below)
- Scissors
- Candy and small toys (For adults you can substitute small useful items, gift cards, and a variety of other items
- Paints and/or Colored Crepe Paper. Permanent Markers are also useful for details.
- Balloons
- Tape (masking tape)
- String for hanging up your finished masterpiece
- Scissors (optional)
Paper Mache Recipe for Making Your piñata(No Cooking Required)
There are many ways to make paper mache but the simplest is the traditional “no cooking needed” paper mache recipe. You will need the following:
- Water
- Flour
- Large Bowl
- Newspaper – because it is common but you can use any type of paper such as plain unlined paper
- Wax paper to line your work area as paper mache can be messy
Directions
- Be sure and line your work area with the wax paper or plastic sheeting to make the area easy to clean.
- The flour and water are to be combined to make a paste. You can use a mix of about 2 and a half cups of water to 2 cups of flour. Stir the flour and water into the bowl and mix until it is smooth. (You can alse use 3/4 cup white glue to 1/4 cup water or pre-made liquid starch found at your supermarket)
- You will then need to tear your newspaper or paper into strips about six to eight inches long and an inch to two inches wide. Don’t try to be neat and cut the paper with scissors; the torn edges will adhere more closely and give a smoother overall surface to the finished pinata.
- Soak your strips in the water and flour mixture. The paper should be thoroughly saturated with the paste. (Note: Heavier paper will require a longer period in the mixture.)
- When your paper mache is ready you should blow up your balloon and tie it off securely. The balloon will be your cavity to fill with candy. (Note: You can use more than one balloon of various sizes and shapes to create more intricate designs. Cardboard tubes from toilet paper or paper towels are also useful to add arms and legs to your basic balloon body later. You can also tie loops of string on the balloons to shape them.
- Take the paper mache strips and place those evenly over the balloon in opposite directions from each other when possible. Use two layers of paper mache to completely cover the balloon except for a small hole at what will be the top of the container and through which you will remove the balloon after you pop it and also to insert the contents. (Note: Be sure to Place the second layer of newspaper diagonally in the opposite direction of the first layer to make the pinata stronger. Depending on how strong you want the piñata, let it dry then add a third layer. For small children, two layers will be
enough.
- You might also want to include one or two loops of string around the balloon and between layers of paper mache with the ends loose at the top to make hanging it up easier. Alternatively, After the pinata dries, you can make 3 or 4 small holes around the opening of the piñata and lace it up with string to hang the pinata
- The piñata will require at least 48 hours of drying time.
- When it is dried pop the balloon through the
small hole at the top and take the balloon out.
- Extra cardboard, Styrofoam, and paper rolls can be used to add arms legs and other features to the basic body.
- Decorate by gluing small strips of crepe paper that has had the ends feathered with scissors or by painting.
- Hang colored crepe paper streamers from the bottom of the pinata for the finishing touch.
- Fill with candy and toys or other party favors and gifts. Tie the ends of the exposed string at the top together firmly making a short string handle, and suspend the piñata with another length of longer string or a rope attached to the shorter handle.
Here are some simple ideas for Pinata Designs
- Teddy Bear Pinata
To make a teddy bear, follow the directions above and cut out two ears from cardboard. Paint them to the perfect teddy bear color and attach them to the balloon with a little paper mache or glue. Add facial details most easily by cutting out the face from heavy construction paper or painting on the face. You can also draw the face using permanent markers. The finished Pinata can be painted to traditional teddy Bear colors or can be as fantastically colored as imagination desires. With a little creativity you can create a Panda with this design as well.
- Flower Pinata
Make your basic piñata and then complete it by painting or covering with tissue or crepe paper. Then cut large craft paper petals to glue around the outside of your candy filled container. The beauty of this is the craft paper or construction paper petals are already brightly colored. Allow the glue to dry thoroughly on the paper petals, then hang, and enjoy!
Tips
- A piñata is more appropriate for outdoor games or where there is ample space. You can also use a garage, auditorium or some other indoor facility of the right size.
- When gluing the newspaper strips to the balloon it can be difficult to hold the balloon in position. To make it easier, rest the balloon in a bowl that is covered with plastic wrap.
- Make the surface of the newspaper as even as possible so the pinata is easier to decorate and looks smoother. You will use crepe paper later to add texture and color.
- Add the final layer using torn strips of white computer paper or paper towels to allow for easier painting and more vivid colors in decorations.
- Use individually wrapped candy to fill the pinata. Bulk candy may be cheaper but when the pinata bursts all the candy will fall onto the floor. Other contents can be added suited to a specific theme or holiday as well. Add gospel tracks to the mix for an evangelistic event. Confetti is a little messy but can also add some fun.
- Foam board, cardboard, paper roll tubes, and bits of Styrofoam can be used to add features to the basic balloon.
- Be sure to leave yourself plenty of time in order for all of the layers of the pinata to dry. Usually it requires several days to make a pinata, so plan early in advance of your event.
With a little bit of time, some imagination and perhaps some help from the youth you can have a beautiful and specially made party game filled with fun and surprises. Hang this specially crafted party favor up in time for the party and watch the youth’s eyes light up and the laughter that ensues. Hint: if you have made your festive vessel
especially durable it is possible the younger children may require a little assistance to open it up, but don’t worry they won’t mind too much. Older kids and adults will have less trouble breaking open their piñata.
How to Play the Piñata Game
- Find a place to hang the piñata. You can easily hang it from a tree branch or a basketball hoop by simply tossing the string over the branch. After dangling the piñata with the string, lift it into the air by pulling the string tight and holding it in position. The pinata can be lowered or raised by pulling on the string.
- The youth will need a blindfold and a stick. A broom handle works great, but a walking cane or bamboo pole can also be used for youth to swing at the pinata.
- Organize the youth in a line with the youngest or the shortest one a the beginning of the line all the way to the tallest at the back. You can also put the girls first as well.
- Usually participants are blindfolded, spun around a couple of times and pointed in the general direction of the pinata. They are then handed the stick to swing at the pinata. They are usually given a limited number of swings, usually three swings per turn.
- BE VERY SAFETY conscious and keep other youth a safe distance from the pinata and the swinging stick. This is meant for the safety of the rest of the youth so that they do not get hit by the blindfolded participant.
- When the pinata breaks, the youth swinging the stick must place the stick on the ground and only when the stick is on the ground can everyone run in and get the goodies.
Taking it to the Next Level
In addition to the traditional symbolism associated with the pinata at Lent and Christmas. A pinata (piñata) could also be used to illustrate a variety of lessons concerning the blessings of God and of the free gift of Salvation. Here are a few simple truths that might apply depending on your theological perspective:
- We don’t always know what blessings we are going to receive, but we do know that they are chosen by God and will be something fantastic.
- They are a gift prepared by God in advance. We only need to receive them.
- We don’t know when they will be released. Sometimes we may work for a long time before they are
released.
- Sometimes it is something that someone else does that releases the blessings and they are shared with us.
- When God releases Blessings in our lives we need to share them with those around us.


MORE IDEAS? See “Creative Object Lessons”
200 page e-book that explains everything you need to know when planning your very own object lessons. It contains 90 fully developed object lesson ideas and another 200 object lesson starter ideas based on Biblical idioms and Names / Descriptions of God.
Learn More…

![]()
 Easter Collection


 Description
 Light is intrinsically linked with Christmas. The coming of the light was foretold in Prophecy and Christ came as the light of the world. The wise men followed the light of a star to Jesus. Jesus came as the light of men.
